Basement Waterproofing for Homes on Sloped Lots

A house on a sloped lot can feel like a prize. The views are often better, daylight reaches the lower level more easily, and the site can give the home a distinctive shape that flat lots rarely offer. Yet the same slope that makes the property attractive also changes how water behaves around the foundation. That single fact drives nearly every basement moisture problem I see on hillside homes.
On flat ground, rainwater usually spreads and drains in a more predictable pattern. On a sloped lot, gravity concentrates runoff. Water moves downhill, gains speed, and often gathers against the uphill side of the home. If the basement wall sits in that path, the structure is under more hydrostatic pressure than a similar house built on level terrain. Basement Waterproofing in these conditions is not just about coating a wall or sealing a crack. It is about understanding where the water starts, how it travels through the soil, and where pressure builds long before moisture appears on the basement floor.
That distinction matters because many waterproofing failures are not really product failures. They are diagnosis failures. Someone sees dampness on an interior wall, applies a paint-on sealer, and assumes the job is done. The next storm proves otherwise. A sloped lot demands a site-wide approach, one that starts uphill and works down.
Why sloped lots create unique basement problems
The uphill side of the house usually carries the biggest burden. During a hard rain, water from the yard, neighboring lots, hardscape surfaces, and roof runoff can all move toward that side. If the grading pitches even slightly toward the foundation, the basement wall becomes the backstop. Soil absorbs water until it reaches capacity, then excess moisture presses against the wall and footing. That pressure finds every weakness, from honeycombed concrete to old tie-rod holes to the cold joint where the wall meets the slab.
Clay-heavy soil makes this worse. Clay drains slowly and expands when wet, increasing pressure on the wall. Sandy soil drains better, but on a steep lot it can let water move quickly to the footing before the drain system has time to keep up. In freeze-thaw climates, the cycle becomes more punishing. Saturated soil freezes, expands, and adds stress to foundation walls already dealing with water load.
Another common issue is the walkout basement. Walkout designs are popular on sloped sites because they make excellent use of the grade. They also create transition points where drainage details matter a great deal. Door thresholds, retaining wall tie-ins, stairwells, and patio edges often become leak points. Water rarely respects neat architectural lines. It follows the easiest path, and those junctions often offer one.
I have also seen trouble come from improvements that were meant to help. Homeowners add a beautiful paver patio on the downhill side, or a retaining wall on the uphill side, without fully considering drainage. The result is trapped water, redirected runoff, or backfill that no longer sheds properly. Basement Waterproofing on a sloped lot often requires revisiting earlier landscaping decisions, not just the foundation itself.
The difference between dampness and structural water intrusion
Not every wet basement indicates the same level of failure. Condensation can mimic leakage. So can a dehumidifier that is undersized for the space. But true water intrusion on a sloped lot usually leaves a pattern. Moisture appears after sustained rain, snowmelt, or irrigation cycles. It tends to show up on the uphill wall first, or at corners where runoff concentrates. Efflorescence, that chalky white mineral deposit, is a classic sign that water is moving through masonry or concrete and evaporating on the interior side.
When I walk a basement on a hillside property, I pay close attention to timing and location. If the homeowner says, "It only happens after a really heavy storm, and always on that back wall," that tells me more than a moisture meter reading alone. If they say the sump runs constantly for two days after rain, that suggests the perimeter drainage may still be functioning, but the water volume is high. If the carpet near a walkout door gets wet during windy storms, I start looking at threshold elevations, surface drainage, and flashing details.
Structural symptoms deserve even more attention. Horizontal cracking, wall bowing, or inward movement are signs that water pressure may be contributing to a bigger foundation problem. Waterproofing and structural stabilization are related, but they are not interchangeable. A bowed wall will not become safe because someone injected polyurethane into a crack. On https://riveryxfl995.slatecurrent.com/posts/how-sump-pumps-support-effective-basement-waterproofing sloped lots, water and soil loads often work together. The repair plan has to address both.
Start outside, always
The most effective basement waterproofing strategy for a sloped lot begins outdoors. That is not a sales line. It is simple physics. If water never reaches the wall, the wall does not have to resist it.
Roof drainage is usually the first thing I check because it is visible, measurable, and often underestimated. A modest roof can shed a surprising amount of water in a short storm. If downspouts dump beside the foundation on the uphill side, the house is effectively being irrigated every time it rains. Extensions should carry discharge far enough away that water cannot loop back downhill toward the footing. On many lots, "far enough" means more than the standard splash block can manage.
Grading comes next. The soil should slope away from the house, even on the uphill side where space is limited. That is easy to say and harder to achieve when the yard rises sharply behind the home. In those cases, a swale or interceptor drain higher up the slope can catch runoff before it reaches the foundation zone. This is one of the most valuable upgrades for homes where the backyard acts like a funnel.
Retaining walls deserve a careful look as well. A retaining wall that lacks proper drainage can become a hidden reservoir. Water builds behind it, then finds its way toward the house through disturbed backfill or low points. A well-built wall includes drainage stone, filter fabric where appropriate, and a path for water to exit without saturating adjacent soils.
Hardscapes can also redirect trouble. Driveways pitched toward the garage, patios sloped toward a walkout door, and landscape beds mounded against siding all create opportunities for water to collect where it should not. Good waterproofing work often includes some unglamorous corrections, regrading a section of yard, lowering mulch levels, resetting pavers, or extending drains. Those are the fixes that reduce water volume before expensive foundation systems have to engage.
Exterior waterproofing, when it is the right answer
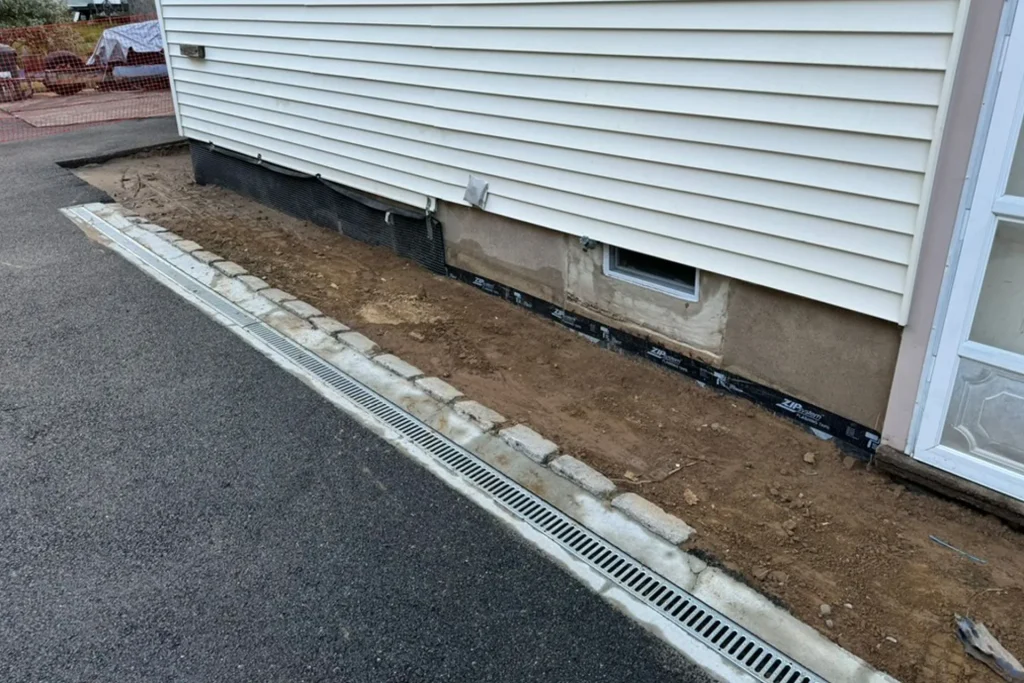
If outside drainage improvements are not enough, exterior waterproofing often provides the most durable solution. This typically involves excavating to the footing on the affected side, exposing the wall, repairing defects, applying a waterproof membrane, installing drainage board, and replacing or adding footing drains. On sloped lots, this method can be especially effective because it addresses water before it penetrates the wall.
People sometimes use the words waterproofing and dampproofing as if they mean the same thing. They do not. Dampproofing, often a thin asphaltic coating applied during original construction, is meant to resist soil moisture. It is not designed to bridge cracks or withstand significant hydrostatic pressure. True exterior waterproofing uses a more robust membrane system and a drainage layer that relieves pressure by directing water downward to a functioning drain.
Excavation has real advantages, but it is not a small decision. Access can be difficult on a sloped site. Decks, AC units, walkways, and retaining walls may need to be removed or worked around. Costs rise quickly when machinery cannot reach the work area easily. Mature landscaping may be disturbed. That does not make exterior work a bad choice. It simply means the decision should be made with full awareness of trade-offs.
In my experience, exterior waterproofing makes the most sense when the problem is concentrated on one or two accessible walls, when the basement is finished and interior disruption would be costly, or when the wall itself has multiple defects that need direct repair. It is also a smart approach when earlier interior systems have managed symptoms but not reduced wall saturation.
When interior drainage systems make sense
Interior drain tile systems and sump pumps are common for a reason. They can work very well, especially when excavation is impractical or when groundwater enters beneath the slab as much as through the wall. On a sloped lot, an interior system is often chosen because the uphill side is difficult to access, perhaps due to a neighboring structure, a narrow side yard, or substantial hardscaping.
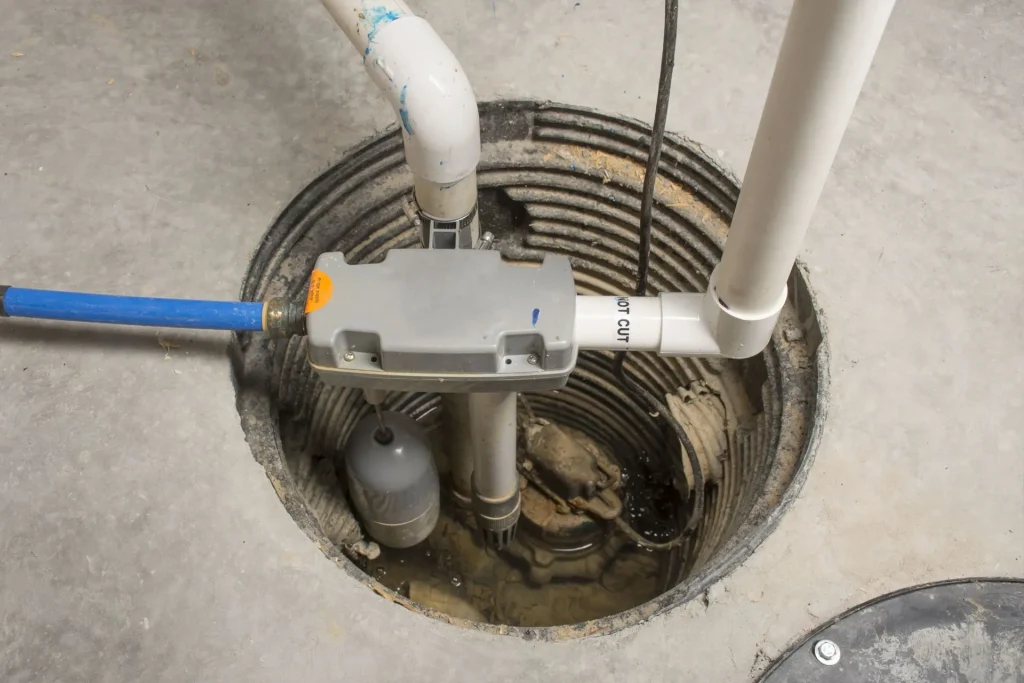
An interior system usually involves opening the slab around the basement perimeter, installing a drainage channel or perforated pipe beside the footing, and directing water to a sump basin for discharge. In many homes, this effectively relieves pressure beneath the floor and manages seepage at the wall-footing joint. If the wall leaks through cracks or porous sections, those can often be treated at the same time.
The limitation is important to understand. Interior systems manage water after it has reached the foundation. They do not keep the exterior wall dry. For many homes, that is acceptable. For some, especially where long-term wall saturation contributes to material deterioration or finished-space concerns, it may not be the full answer. The best contractors explain this plainly rather than pretending one method solves every condition.
A reliable sump pump setup matters more on hillside properties because inflow can spike quickly during storms. Battery backup or water-powered backup is not a luxury if the basement contains finished rooms, mechanical equipment, or storage that would be expensive to lose. Power outages and severe weather have a bad habit of arriving together.
Cracks, joints, and the leak paths people miss
Crack repair is often part of Basement Waterproofing, but not every crack needs the same treatment. A non-structural shrinkage crack that seeps occasionally can often be sealed with polyurethane injection. An active structural crack may require epoxy, reinforcement, or engineering review depending on width, movement, and wall condition. A crack that opens and closes seasonally is a different animal from one that has been stable for ten years.
The wall-floor joint is one of the most common leak paths on sloped sites. Homeowners are often surprised to learn that water can appear there even when the wall itself looks sound. The reason is straightforward. Water builds outside the footing, pressure rises, and the joint becomes the easiest point of entry. This is where interior perimeter drainage systems tend to perform well, because they intercept water at the exact point it emerges.
Window wells are another weak link. Basement windows on the uphill side often sit below grade in wells that collect runoff, leaves, and roof splash. If the well lacks proper drainage or fills faster than it drains, water can enter around the frame or over the sill. I have seen supposedly mysterious basement leaks solved by cleaning a clogged well drain and redirecting one downspout ten feet away.
Then there are penetrations, hose bibs, utility entries, old anchor points, and abandoned openings that were patched casually years ago. Water has a talent for exploiting details that no one notices during dry weather. A thorough inspection pays for itself here.
Signs that a sloped-lot basement needs attention
Some warning signs are subtle. Others are loud and expensive. Homeowners tend to act only after they see standing water, but earlier clues often appear months or years before that point.
- A musty smell that returns after rain, even when the basement looks dry
- White mineral staining on concrete or masonry walls
- Paint blistering, peeling, or dark damp bands along the lower wall
- Water at the cove joint where the wall meets the floor
- Cracks that grow, especially if a wall begins to bow inward
Those symptoms do not all point to the same repair, but they do tell you the basement deserves a closer look. On a sloped lot, delay usually increases the scope of work because moisture problems tend to compound. Wet insulation loses performance. Framing absorbs moisture. Finishes trap humidity. Mold does not need standing water to take hold, only sustained dampness and organic material.
The role of soils, seasons, and neighboring properties
A sloped lot never exists in isolation. What happens uphill can shape the moisture profile of your basement even if your own grading is decent. I have seen one home start leaking for the first time after a neighbor installed a long impermeable driveway that redirected runoff. I have also seen drainage improve dramatically after a simple swale was cut near the property line to intercept sheet flow before it reached the house.
Seasonal patterns matter as much as annual rainfall totals. Snowmelt can be more difficult than summer storms because frozen ground limits surface absorption, sending water across the surface and into low areas. Early spring often reveals issues that remained hidden all winter. Irrigation systems can create their own version of weather, particularly on terraced lots where overwatering one landscape bed sends a slow, steady stream toward the foundation.
Expansive soils create another layer of complexity. When they dry, they shrink and can open small gaps around the foundation. When they become saturated, they swell and increase lateral pressure. That movement can stress waterproofing details over time. A house built on a slope with expansive clay often benefits from more conservative drainage planning than a similar house in free-draining granular soil.
Repair planning should match the house, not a standard package
This is where professional judgment matters. There is no universal waterproofing package that suits every sloped lot. A split-level with a partial basement does not behave like a full-height poured concrete walkout. A 1960s masonry foundation with limited footing depth presents different risks than a newer cast-in-place wall. The finished basement that stores family photos, hardwood furniture, and a home office deserves a different level of redundancy than an unfinished utility space used for seasonal bins.
A good assessment looks at the site in the rain if possible, or at least reconstructs water movement from grading, staining, discharge points, and drainage paths. It also weighs budget against consequence. Some homeowners can tolerate minor seepage in an unfinished storage area if it means postponing major excavation for a few years. Others need a near-zero-risk setup because the lower level is fully finished and used daily. Neither perspective is wrong. The repair plan should reflect the use of the space and the real exposure.
This is also why I caution against choosing purely on price. Basement Waterproofing bids for sloped lots can vary widely, and sometimes the cheapest proposal is cheap because it addresses the visible symptom only. An interior sealer, for example, may make a wall look clean while doing nothing about saturated backfill and pressure outside. On the other hand, the highest bid is not automatically the wisest. Some contractors recommend full-perimeter systems when the problem is localized and better solved through targeted exterior drainage improvements.
Questions worth asking before you hire anyone
A contractor who works regularly on hillside homes should be able to explain the site mechanics in plain language. If they jump straight to a standard system without discussing slope, runoff sources, and discharge routing, keep looking.
- Where is the water coming from, and how can you tell?
- Are you proposing to stop water outside, manage it inside, or both?
- How will discharge be routed so it does not cycle back toward the house or affect neighboring property?
- What happens to wall pressure and moisture if we choose an interior system only?
- What maintenance will this system require over the next five to ten years?
The answers do not need to sound polished. They need to sound specific. Real expertise usually shows up in the details, how the contractor talks about soil type, access, pump redundancy, cleanouts, downspout routing, and the limits of the proposed fix.
Cost, disruption, and the value of staging work
Homeowners often assume they must either do everything at once or do nothing. In reality, many sloped-lot waterproofing projects can be staged intelligently. You might begin with roof drainage corrections, grading, and a swale or curtain drain uphill. Then monitor through a wet season. If seepage drops but does not disappear, the next phase might be an interior drain and sump on the most vulnerable wall. In other cases, one properly executed exterior repair on the uphill side may solve what looked like a whole-house problem.
Cost ranges vary too much by region, access, and wall length to give one universal figure that means much. A simple downspout and grading correction can cost very little compared with foundation excavation. A full exterior waterproofing job on a constrained hillside site can become a major project quickly. What matters is spending in the right order. I have seen homeowners put significant money into basement finishes before addressing drainage, only to tear out new drywall after the first severe storm. That is far more painful than allocating budget to waterproofing first.
Disruption should be part of the conversation, not an afterthought. Excavation affects landscaping and access around the house. Interior systems create dust, noise, and concrete work. If the basement is occupied, timing matters. If the project involves a walkout area used daily, temporary access planning is important. Competent contractors discuss these realities upfront.
Long-term maintenance is part of the system
Even excellent waterproofing work needs support from routine maintenance. Gutters clog. Downspout extensions get crushed by mowers. Sump pumps wear out. Soil settles near the house, creating low spots that did not exist when the job was completed. On a sloped lot, those small lapses can matter more because the site naturally drives water toward vulnerable areas.
At least once or twice a year, especially before the wettest season, walk the property with fresh eyes. Watch where downspouts discharge. Look for mulch piled too high against siding, erosion channels forming uphill, or water staining near the walkout. Test the sump pump. If the system includes an exterior drain or swale, keep it clear of debris and overgrowth. Waterproofing is not a one-time event on every property. It is a strategy that needs occasional upkeep.
The best results come from controlling water before it becomes pressure
That is the thread connecting every successful sloped-lot waterproofing project I have seen. The most durable fixes reduce water volume, improve drainage paths, and relieve pressure before moisture forces its way through the foundation. Sometimes that means excavation and a full exterior membrane. Sometimes it means interior drainage backed by smart discharge design. Often it means a combination, along with unglamorous but effective site work uphill from the house.
Homes on sloped lots can have dry, usable basements for decades. But they rarely get there through shortcuts. They get there through careful observation, correct diagnosis, and a repair plan that respects how water actually moves across that particular piece of ground. That is what good Basement Waterproofing looks like when the lot is working against you.
ARD Waterproofing
98 Smull Ave, West Caldwell, NJ 07006, United States
+1 917-691-8411
FAQ About Basement Waterproofing
Can you 100% Waterproof a Basement in West Caldwell?
A properly designed system can substantially reduce basement water intrusion, but no method can promise protection against every flood, equipment failure, or future change in site conditions. The first step is identifying whether moisture comes from surface runoff, groundwater, plumbing, or condensation. Solutions may include grading and gutter improvements, drainage, foundation repairs, and a sump system. Review the specific coverage and exclusions of any written warranty.
How much does it cost to professionally waterproof a basement in NJ?
There is no single price that fits every basement. Cost depends on the cause of the leak, the area needing work, access, excavation requirements, drainage design, sump equipment, and restoration of disturbed finishes or landscaping. Request an on-site assessment and an itemized written estimate that explains the scope, exclusions, and maintenance requirements before comparing proposals.
How long does foundation waterproofing last in West Caldwell, NJ?
Service life varies with the waterproofing materials, installation quality, soil and water conditions, and maintenance. Drainage components and pumps may require servicing or replacement even when other parts of the system remain functional. Keep gutters, drainage outlets, and sump equipment maintained, and have recurring leaks or changes in foundation condition assessed. Ask for product-specific expectations and written warranty terms rather than relying on one lifespan for the entire system.